Pages

Thursday, 30 July 2015

Patios That Inspire

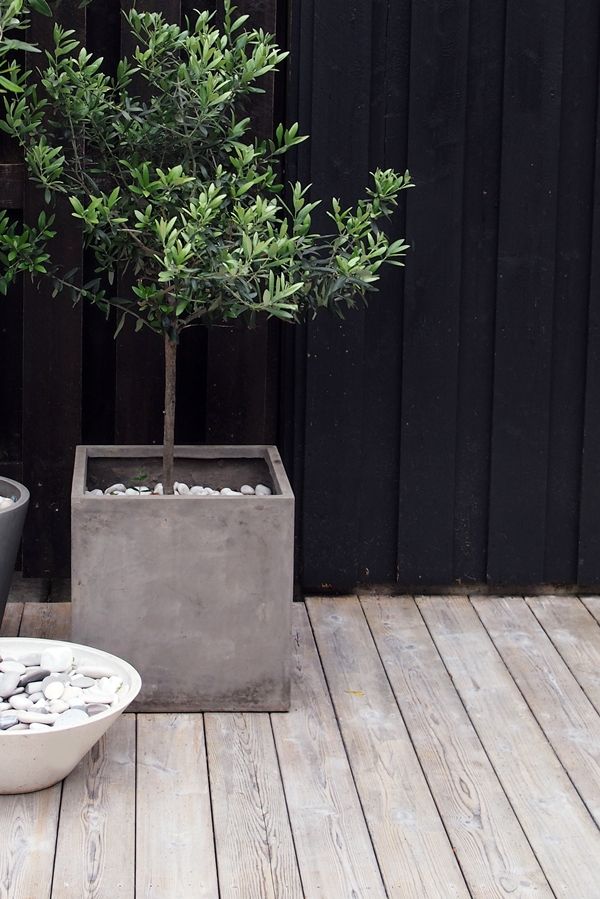
I can't seen to stop planning (dreaming of actually) my rooftop patio. Here are some lovely patios from Pinterest which are a great source of inspiration.


Saturday, 25 July 2015

Rooftop Patio Moodboard


I've fallen into a good weekend routine, waking up at the crack of dawn for a peaceful yet invigorating session of yoga on my rooftop patio.

At first light, I lay out my yoga mat, light the candle of my aromatherapy oil burner, prop my laptop on a little stool, click play and follow along the yoga routine. I see neighbors leave for their morning walks or take their bicycles out just before I go into savasana and the newspaper man would have just completed his deliveries by the time I finish. Its a beautiful way to start the morning...

However, the rooftop patio is now bare and  I so yearn to turn the stark empty space into an inviting and tranquil garden for relaxation. Although this is probably the last area of the house the hubby and I planned to take on (I still have bare bathrooms and a very disorganized laundry/utility room among otheres), I couldn't help myself from planning out what I'd like the space to look like.

My vision... a space with contemporary mix of black iron and wood, lots of greenery, a water feature, comfortable chairs to lounge on and lanterns filled with scented candles.


Saturday, 18 July 2015

Weekend Project: Working With Leftover Material

Having made too much of the glitter & Mod Podge mixture for my last project I looked around for something that could use a quick 'glam up' and found an old box tray in my 'failed projects' bin. I had bought the box tray from Daiso a long while back and had tried to spray paint it (I went through a spray paint obsession phase). It turned out disastrous and I learned that I could not spray paint anything and everything.


Luckily for me this time, the coat of glitter turned out really well on the outsides of the box. To give the insides a little more interest,  I covered it with left over patterned paper from my 'Retro Chest' project.

Although a small unplanned project, it was super fun & rewarding to make something nice out of a previously failed project using only leftover materials. Ahhh...the unexpected joys of crafting.


Monday, 6 July 2015

Weekend Project: Believe

Project #2 from last month's Kaisercraft haul.  This time I took pleasure in decorating another beyond the page project, an MDF cutout of the word 'believe'.

You know I've been a big collector of  LOVE over the past couple of years. But everytime I see inspirational wall art being displayed, I can't help but want more of a collection of my own. So here goes - the first piece to be added to my extended collection!


But we can't just leave it like that can we?
Oh the things one can do with some Mod Podge and some glitter! And a little crafting tip here too... cover your craft mat with cling wrap when painting, it saves a lot of cleaning afterwards.


And here it is - all finished and ready to induce a smile every time I pass it. And I found just the place for it too...right on top of my inspiration board!

Saturday, 20 June 2015

Dad's Retro Chest of Mini Drawers

I've been wanting to do a 'beyond the page' project for quite a while now and took the opportunity to stock up on more than a few kits from the Kaisercraft outlet store while I was Down Under last month.

I was thrilled when my hubby also picked up a kit for himself; the mini drawers and asked if I'd put it together for him. I was even more happy when he also participated actively to pick out paper for his project. He selected a retro looking sheet with lots of 'manly' tags (this patterned  paper is from the Garage Days Collection named Spare Parts) and we picked up a few other pieces to complement. I guess all those years of dragging him along to the craft store finally rubbed off on him!


I started the project by painting the edges of the frame with Tim Holtz's Distress Crackle Paint in 'Frayed Burlap' and covered the top and back of the frame with the coordinating back from the 'Spare Parts' patterned paper we had picked out. Paper from the Curiosity Collection called 'Eccentric' was used on the 2 sides and 'Rare', also from the Curiosity Collection on the bottom pane.

I then cut out the retro tags from 'Spare Parts' and used them as decoration and also added a key charm from my collection and the letter 'j' on top (hubby's initial) for some added interest.


Next, I assembled the chipboard drawers with Beacon's 3-in-1 Advanced Craft Glue. This is my favourite craft glue, very fast drying and it held the boxes together very well.

Initially, the little drawers easily fell out from the frame when the unit was moved. So to make sure the boxes stuck to the frame, I decided to hold them by adding magnets. I drew out the grid of the boxes on the back panel of the frame and glued on the magnets.


I then added magnets to the back of each of the chipboard drawers. After the magnets were in place on both frame and drawers, they were covered with 'Download' patterned paper from the Technologie Collection leftover coloured cardstock respectively. 


Finally, I made a template for the front of the drawers and cut out 9 more tags from the 'Spare Parts' patterned paper to cover the front of the pull out drawers.


I was pleased with the final product, and this has been one of the most fun projects I've completed thus far. Crafting has always been a hobby but working on a project as a gift for a loved one is even so much more gratifying.

The hubby was thrilled with the final product dubbing it "Dad's Mini Drawers".


Thursday, 4 June 2015

Mac's Kitchen Cheat Sheet : Quick & Easy Herbal Chicken

I remember my school days when my grandmother would make me drink Chinese herbal soups for my well being or to improve my mental alertness blah, blah, blah…how I hated them. I used to hold my breath, gulp down the horrid smelling (and sometimes black, evil looking) brews as fast as I could and then pop a mint into my mouth after to get rid of the bitter aftertaste. 

Those episodes have definitely influenced my taste buds because today I often cook them for myself, with an easy modern twist of course! One of my favourites is this super easy herbal chicken. Here's the cheat...

Ingredients:
  • 1 bottle of essence of chicken
  • 1 chicken thigh
  • 1 teaspoon Goji Berries
  • 1 or 2 small slices of ginseng
  • salt and pepper 

Method:
  1. Season the chicken with salt and pepper. I tend to use quite a generous amount of pepper as I like the peppery taste.
  2. Place in a plate and pour in the essence of chicken.
  3. Add in a teaspoon of Goji Berries.
  4. Add in the slices of ginseng (optional for extra oomph)
  5. Steam for about 30 minutes (depending on the size of the chicken thigh) until the chicken is cooked.
  6. Serve with hot steamed rice. 


Monday, 25 May 2015

According to [the nest], I Have a Grownup Bedroom

I was thoroughly amused by the time I got to the end of the "10 Signs Your Bedroom Needs To Grow Up" Slideshow on [the nest]. I started reading expecting to go "Ohh I'll need to do this and add that and do that..." but instead it was "Ohh, I have this and I've done this and that too..."

Then I did a childish "Yeah, I'm a grown up" dance at the end. Oxymoron, I know.
So here they are - the signs that a bedroom needs to grow up.


1. You Only Have Mismatched Bedding

"A complete bedding set including sheets, pillowcases and a duvet will pull the room together in a more sophisticated way. Look for a high thread count and mature colours, like cream, gray & blue"

Grays and blues - check! How about some brown, too!


2. You Don't Have A Headboard

Headboard? Check! Customized, no less.

Bedding set, headboard and bedside tables...check!


3. You Don't Have Bedside Tables

"Time to replace the milk crates with proper bedside tables - two of them! For someone who needs her phone, books, a glass of water ad a hundred other things, a sturdy wooden style with drawers or a cabinet will fit the bill"


I could have sworn this article was about me cos I'm that girl who needs her water, phone, keys, books, magazine and glasses (cos I wear them) by the bedside each night. And befittingly I do indeed have the sturdy wooden style bedside table with drawers - two of them too!


4. Your Beside Accessories Are Lacking

Well, my husband has a nice enough alarm clock on his side of the bed and that's all he actually needs on the side table. So the rest was up to me to style with a simple painting and a "wu-lou".


On my side of the bed, the white tray is the most functional item used to corral my phone, keys and glasses each night. Books and magazine go in the shelf under the drawer. 


5. You Don't Have Curtains

"Curtains can change the feel of the bedroom, so take down those cheap, broken blinds and choose a window treatment that speaks to your style."

Seeing that the 'windows' in the room are sliding glass doors leading out to the balcony, I have a curtain box in the ceiling and floor length curtains complete with sheers too. Necessary to maintain privacy and block out the sun on the occasional mornings I get to sleep in!


6. You Have No Art

"Here's a chance for you and your guy to really showcase your personal style. Black-and-white photos say you're a sophisticated and cosmopolitan couple, while those with more traditional taste might hang classic oils on their walls"

Hmm...so here's where I feel a little..young at heart? So we've got art picked out for the bedroom. And no, they're not black-and-white photos or classic oils. A set of fun prints which are going to go above the bed. Only thing is I just haven't gotten around to framing them and hanging them up yet. Its the thought that counts right?


7. Your Furniture Clashes

"We love eclectic furniture that works together, but if you really want to change the feel of your bedroom, splurge on a set that traditionally includes the bedframe and headboard, side tables and dressers or armoires."

Clashing furniture? Maybe someday. For now, I have a set so coordinated, even the closet doors match.

Matching closet doors!


8. Your Only Lighting Is Overhead

"Nothing sets the mood in your bedroom like good lighting. Coordinating table lamps, floor lamps or wall scones will spruce up your digs in a flash"

Why yes, I do have coordinating table lamps on my coordinating bedside tables! Gosh, I'm starting to sound boring!


9. Your Floors Are Bare

"Center your space with a large area rug or decorate with smaller rugs in different spots of your room for a pulled-together look"

With all the coordinating furniture and table lamps, the last thing we needed was a coordinating rug. The oriental rug in the room was chosen to clash with the theme of the rest of the room, something to break up the monotony.

Yeah, right! The lies I tell myself. If only my decorating plans were so put together. Truth of the matter, the hubby and I went a little (maybe a lot) rug crazy when shopping for the new house. We have so many rugs and this large one we got just happened to fit size wise between the bed and the TV shelf. So there you have it, my decorating style called "making do with my impulsive buys"


10. Your Walls Are Lacking Colour

"Another way to make an impact is to create a color scheme for your walls. Grey is a sophisticated and trendy wall color, but as long as you avoid typically juvenile colors"

Grey it is, with an awesome feature wall too - colour and texture!


And there you have it.The 10 signs, according to [the nest] that my bedroom is grown up! View the original slideshow from [the nest] here.