Pages

Showing posts with label craft. Show all posts

Saturday, 18 July 2015

Weekend Project: Working With Leftover Material

Having made too much of the glitter & Mod Podge mixture for my last project I looked around for something that could use a quick 'glam up' and found an old box tray in my 'failed projects' bin. I had bought the box tray from Daiso a long while back and had tried to spray paint it (I went through a spray paint obsession phase). It turned out disastrous and I learned that I could not spray paint anything and everything.


Luckily for me this time, the coat of glitter turned out really well on the outsides of the box. To give the insides a little more interest,  I covered it with left over patterned paper from my 'Retro Chest' project.

Although a small unplanned project, it was super fun & rewarding to make something nice out of a previously failed project using only leftover materials. Ahhh...the unexpected joys of crafting.


Monday, 6 July 2015

Weekend Project: Believe

Project #2 from last month's Kaisercraft haul.  This time I took pleasure in decorating another beyond the page project, an MDF cutout of the word 'believe'.

You know I've been a big collector of  LOVE over the past couple of years. But everytime I see inspirational wall art being displayed, I can't help but want more of a collection of my own. So here goes - the first piece to be added to my extended collection!


But we can't just leave it like that can we?
Oh the things one can do with some Mod Podge and some glitter! And a little crafting tip here too... cover your craft mat with cling wrap when painting, it saves a lot of cleaning afterwards.


And here it is - all finished and ready to induce a smile every time I pass it. And I found just the place for it too...right on top of my inspiration board!

Saturday, 20 June 2015

Dad's Retro Chest of Mini Drawers

I've been wanting to do a 'beyond the page' project for quite a while now and took the opportunity to stock up on more than a few kits from the Kaisercraft outlet store while I was Down Under last month.

I was thrilled when my hubby also picked up a kit for himself; the mini drawers and asked if I'd put it together for him. I was even more happy when he also participated actively to pick out paper for his project. He selected a retro looking sheet with lots of 'manly' tags (this patterned  paper is from the Garage Days Collection named Spare Parts) and we picked up a few other pieces to complement. I guess all those years of dragging him along to the craft store finally rubbed off on him!


I started the project by painting the edges of the frame with Tim Holtz's Distress Crackle Paint in 'Frayed Burlap' and covered the top and back of the frame with the coordinating back from the 'Spare Parts' patterned paper we had picked out. Paper from the Curiosity Collection called 'Eccentric' was used on the 2 sides and 'Rare', also from the Curiosity Collection on the bottom pane.

I then cut out the retro tags from 'Spare Parts' and used them as decoration and also added a key charm from my collection and the letter 'j' on top (hubby's initial) for some added interest.


Next, I assembled the chipboard drawers with Beacon's 3-in-1 Advanced Craft Glue. This is my favourite craft glue, very fast drying and it held the boxes together very well.

Initially, the little drawers easily fell out from the frame when the unit was moved. So to make sure the boxes stuck to the frame, I decided to hold them by adding magnets. I drew out the grid of the boxes on the back panel of the frame and glued on the magnets.


I then added magnets to the back of each of the chipboard drawers. After the magnets were in place on both frame and drawers, they were covered with 'Download' patterned paper from the Technologie Collection leftover coloured cardstock respectively. 


Finally, I made a template for the front of the drawers and cut out 9 more tags from the 'Spare Parts' patterned paper to cover the front of the pull out drawers.


I was pleased with the final product, and this has been one of the most fun projects I've completed thus far. Crafting has always been a hobby but working on a project as a gift for a loved one is even so much more gratifying.

The hubby was thrilled with the final product dubbing it "Dad's Mini Drawers".


Sunday, 10 May 2015

Weekend Project: Another Quick Paint Job

Spray paints and I have become real good friends. Until a couple of years ago, I never realized how easy it was to alter the colour (and hence appearance) of ‘old junk’ to give them a brand new lease of life.

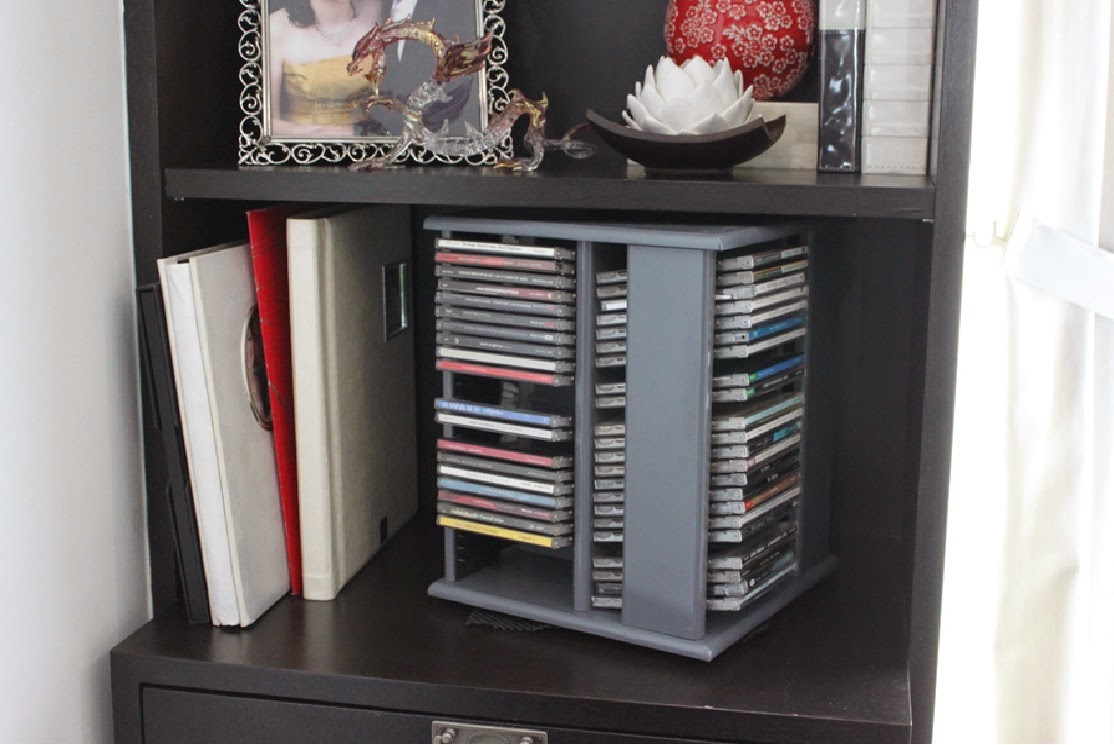
My latest save - an old rotating CD rack I’ve had for years. The simple rack with a light brown wood grain finish just didn't fit into the theme of the living room so, I decided to spray it gray. 
 
A good sanding over and three coats of gray paint later (using 2 cans of spray and costing only about RM15), the rack took on a more modern look and added a little contrast to the living room shelf.  It would have been otherwise a waste to throw away the very functional rack and I’m just thrilled to have been able to ‘recycle’ it.


I now find it easier to shop or just plain recycle items for its function, shape and size instead of its appearance or colour. An item with good bones is what matters. Appearance and colour - easily altered.

Sunday, 19 October 2014

Chalkboard Paint & Jam Jars

Hi, I'm Ink and I love glass jars. 
Who knew that all those glass jars Dad never threw out could be used in like a million awesome ways other than storing manageable portions of condiments?

And I also love chalkboard paint. 
. OMG something that can allow me to write on just about anything! Beware all surfaces in my personal space! To do lists for every room, here I come!

Here are just some of the awesome ways both can be used.
Image from Pinterest: http://goo.gl/uN10kc
From really pretty ways to serve dessert

Image fromn Pinterest: http://goo.gl/lchndY
To a very cute way to pack prezzies (or, you know, pack your own stuff, or the stuff you were supposed to buy as prezzies but decided you liked them foryourself). 

And chalkboard paint!
Image from Craft River: http://goo.gl/grMU1N
Oh, to be able to label everything!

Image also from Craft River

Really, I mean everything!

Another beautiful image from Craft River
And scrawl my to do lists and random ideas just about everywhere.

But I get ahead of myself. 
My first modest experiment with chalkboard paint: 

A bunch of old jam jars lying around the house.
Mac's can of chalkboard paint.
Some old newspapers. 
The pesky duo: Dog and Baby running around the house. 

The result:
 4 glass jars with lids ready for the scrawling on; one of which had to be re-painted.
One Baby who spent a good 20 minutes having paint rubbed off her palm with baby oil. Yes, Mac, that's your baby for you.
And a curious Dog circling the lids drying on the porch.
And here's one of them - finally a way I can store some of my scented tea lights..you know, other than in the partially opened packaging, on the bottom shelf.
To figure out next - how to actually write/draw anything on such a small space!

Sunday, 28 September 2014

Gifts: Time to Read

Three months ago, I had a couple of pretty harrowing conversations. 
One with the impressionable new intern who called me boss. At which point I responded that my boss is our boss. I'm just the one who has to guide him along the way.
And the other one with my boss, who told me here's my chance to learn how to be someone's boss. 
Gah.
I've always been the baby, the one being mentored, the one getting advice. 
What the hell am I supposed to do when I'm supposed to actually be a mentor?
Three months down the line, it's time to bid adieu to the intern who almost seems like a permanent part of the team.
And, as part of his farewell present. here's how I've framed up what I think is the most important piece of advice I'd given in the past couple of months:
Along with the book I'd been talking about which had gotten a blank stare along with the answer 
"I don't have time to read books". 

Here's the whole set of things.
In case you're wondering, the orange thing is a "keep calm and" notebook. Wish I'd had time to go have a "Keep calm and WRITE THAT DOWN!" notebook made. That would be the second most important thing I've said to him the entire time. 

And yes, if you think that top item looks a little familiar on this blog, you're spot on. 
I love that stuff. And so does he.
Don't judge us.


Sunday, 10 August 2014

Gifts: Live Learn Laugh

Farewells are always a little bittersweet. But when you know the person in question is heading towards better things, the best thing to do is to wish them well and, of course, give them a kick-ass farewell gift. 
  
Decided to do something a little different this time What you see here is the envelope instead of the card itself. 
Live. Learn. Laugh. Kind of sums up the friendship. 

Here's my card on the inside. A hopefully useful reminder while a new day-to-day routine is being developed. :)


So, what was my kick ass gift?
This super cute travel journal from Typo, RM 75.
Spent a good half hour just browsing all the designs they have. Mostly because I was struggling not to get one for myself, too! So pretty, I just want to quit my job and travel for a year just so I have an excuse to use one of these.
But no, I just got the one. And gave it to someone who will actually have use for it in the immediate future. Yay!

Monday, 4 August 2014

Weekend Project: Quick & Easy Magnet Update


Last weekend as I sat looking at the inspiration board hanging in front of my desk, some old magnets (I've had since my school days) caught my eye. I suddenly had the impulse to give the boring and tired looking magnets an update. I decided I wanted a little "bling".

Blah to Bling in under 15 minutes!


My little craft project took me less than 15 minutes to complete. Here's how.... evenly spread craft glue over the magnet, sprinkle a generous amount of glitter flakes to cover the entire surface and let dry. Finally, seal the giltter onto the magnet with some nail polish top coat. My old bottle of top coat didn't work so well on the nails but I found great use for it for crafting!

Easy peasy!

Monday, 14 July 2014

Vintage Mini Album

I finally finished my very first mini album...a project of mine which has been almost 3 years in the making. I started this after having watched one too many mini album reveals on youtube.  All the gorgeous, intricate and detailed projects made by so many talented ladies out there really got my crafty wheels spinning. Think I completed about 90% of the project when I was pregnant and then came baby. After that my almost completed project just sat on the shelf till this month when I told myself I had to finish it, part of my resolution this year to try to complete the many unfinished projects I have lying around.

My "Memories" mini album will be a collection of great photos & some small souvenirs hubby and I have collected across the decade we've known each other.


The cover has fabric and paper flowers and the title Memories. The album is held shut with a magnetic ribbon clasp.


1st page: Simple distressed page with vintage dress form stamp.
2nd page: Small pocket for a pull out book, with embossed vintage stamps and tags. The little pull out book flips open has pockets for tags and lots of journaling space.


Close up of the stamps and embossing. The bird cage and journalling spot at the back of the pull out mini book.


3rd page: A little envelope page with black ribbons & flowers. The scalloped ribbon on the top of the page is handmade.
4th page: Photo mat which opens up.

The envelope containing sparkly black photo mats is held shut by magnets.


5th Page: More pockets for my many vintage tags. The front of the pocket with the beautiful red flower I'm also going to use a photomat. Also added some bling swirls for some interest.
6th page: Little flip open library pocket with more tags.Simple paper lace on the pocket is from the 100 Yen shop distressed with glitter mist.


7th page: Flip open mini book with lots of empty space for journalling.
8th page: Big pocket for more tags and a place to store sore souvenirs (movie tickets, entrance tickets from our travels, photos etc.)


The insides of the little mini book is sprayed with glitter mist and with its embossed flowers for a little more vintage feel. Edges of the book are scalloped with lace and tied with a simple white ribbon.


9th page: Vertical pocket to hold tags are lined with lace paper and ribbon and layered with a row of bold red 3D roses.
10th page: Beautiful vintage paper at the back will be a great journalling page. Also added a small pocket to hold another mini book.

The lace flower here is handmade and some stamping details on the mini book.

Monday, 16 June 2014

Weekend Project: Customized Wedding Gift

I spent a weekend crafting a wedding present for my baby sister's friend. Such is the un-glamorous life I lead. Sigh.........

We got the inspiration for this project from a specialty store we chanced upon while in Singapore last year. Ink was in wedding gift heaven trying to choose between several beautiful wedding themed china, stationery and loads of cute typography pieces for D's wedding. I didn't mind owning half the things in the shop either.

But, as usual, we hit that point where we looked at each other and said "Meh...we could make something like that, too!"

After the trip, I came home and decided to do a customized piece of my own. Handmade and personalized items are always the best wedding gifts!

And so here it is,  the "Mr & Mrs" plaque, customized for D's wedding.


Monday, 9 June 2014

Make It Yourself (and in this case...Myself)

There is no doubt that "picky" is my middle name. Strange as it sounds, I've just been unable to find the perfect throw pillows for my living sofa. All I wanted were two pairs of throw pillows with geometric patterns in a soothing neutral colour. They would have to be cotton of course, soft and comfortable enough to hug and put my face on. But it has just been one thing of another, wrong design/pattern, wrong size, wrong material, wrong colour, wrong price...oh don't even get me started on the price...70+ Ringgit for a throw pillow? I think not!

Photo & design by Ink

I ended up making my own. It was a bit a an accident really....I chanced upon this great light brown upholstery grade cotton fabric (love the fabric) with the simple chequered pattern I wanted, bought a meter of the fabric and went to work making my own pillow. It turned out surprisingly well and I bought more fabric in a different pattern, this time the octagons, and made more.


 Here they are on my sofa. A simple layered neutral look for the apartment living room.


Then mum saw the pillows and requested for them in red. I was glad they turned out nice as well. She particularly loves the octagons. I know what pillows I'll be having on my sofa next Chinese New Year!


Thursday, 15 May 2014

A little gift

A small parting gift for my desk neighbour of almost 2 years. 
Handmade best wishes card with floral details on the front. 
Stamp on the back says merci.

Friday, 14 March 2014

Book - made with love

It's been a crazy month so far. In fact it's been a crazy year. So much has been going on, there's really no time to even sit down, think about it, and write about it. 

So, my first craft project of the year.
The guestbook for D's wedding, which was a great start to doing all things with.

Here are some of my favourite pages.

Let's start with the very last page of the book.

 Very pretty flower embellishment. 


A couple of simple pages for easy writing.


Making things a little more interesting:

I particularly love this one which has all the things I love doing with craft:
First, the tag with the couple's initials on it and one of the very pretty dragonfly brads I've been dying to use.
The envelope is filled with bits of paper and little cards for guests to write their messages on.

Notes clipped to a ribbon. 

Button!!!!!!! Yeah I just needed an excuse to use that paper with that button.